Learn the basics of Arduino in 10 minutes!
In this course we will see the basics of the Arduino you will need to start your project.

What is an Arduino board?
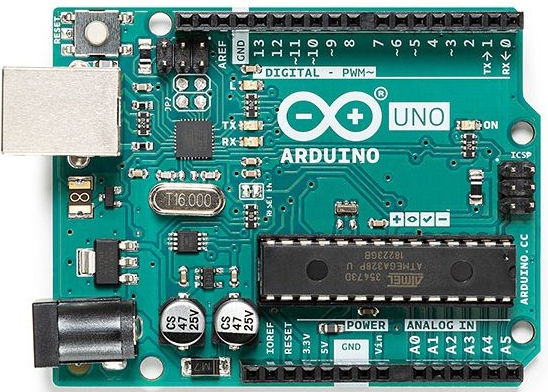
An Arduino is an electronic board that was designed to simplify the use of electronics so that anyone can make their projects with the least amount of knowledge necessary.
There are several Arduino boards that have different characteristics depending on the needs of each project (Arduino mega, uno, mini).
Nevertheless it is the Arduino Uno board which is the most known and the most used, so it is the one we advise you to start with! (It’s the one on the picture on the right)
Arduino has a great community of tinkerers, which will help you a lot to get started and to solve your problems.
The Arduino is a multi-tasking electronic board that can be adapted to any project, which is one of the reasons that makes its strength.
To be able to use an Arduino board in your projects, you will need to learn two things: how it works, and how to program it. This is what we will see in the hardware and software part!
The hardware
With the explanation we just made about Arduino, you probably want to know a little more about this board.
The Arduino board has pins on which you can connect your components. These pins are controllable thanks to the computer program that you will put on your board (to tell it what to do!).
On an Arduino board there are different types of pins:
| Pins |
Description |
| 3.3V / 5V |
These pins are used to power your components. There are two types of pins: 3.3V and 5V depending on the power supply your components need. |
| GND |
This pin allows you to recover the output current of your component |
| Digital Pins |
Allows to control components with a voltage of 0V or 5V (HIGH and LOW) or to retrieve the value of a component (push button for example). Some digital pins have a vague logo in addition. It’s a PWM pin, which allows to vary the voltage at the pin to turn on a LED at half its power for example |
| Analog Pins |
The analog pins can read sensor values (temperature sensor…) or can control some components |
Image of the Arduino board with the location of the different pins:
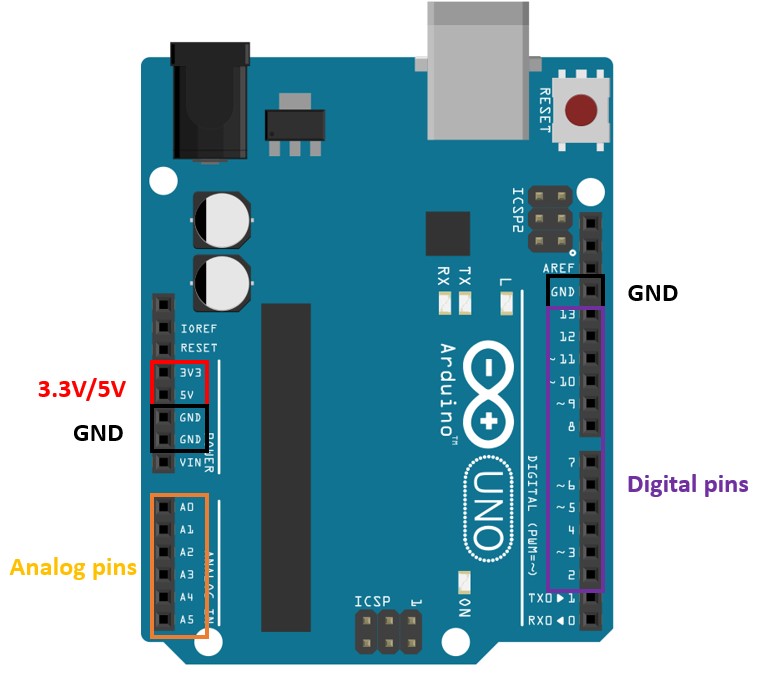
To add a precision to the table, only the analog and digital pins are controllable from your computer program.
We have made dedicated courses to learn how to control the digital and analog pins with the Arduino language.
What is the difference between analog and digital?
A digital signal is a voltage that can take two values: HIGH or LOW. HIGH corresponds to 5V and LOW to 0V. This signal is very useful to detect the state of a push button, or to turn on a LED.
However, if you want to turn on your LED with its half power, you will need a PWM pin or an analog signal.
This one can take an infinite value between 0V and 5V. This signal will be useful to measure and send much more precise values like 0.45V instead of 0V and 5V like in a digital signal.
It exists an analog to digital converter to convert the signal (also called ADC).

Several ways to power your Arduino board !
You have two ways to power your Arduino board: USB plug and Jack plug.
The USB plug is useful to connect the Arduino board to your computer and put your program on the board for example.
The jack socket is rather used to make your project autonomous. You can for example connect a 1.5V battery pack or a 9V battery. However, with the jack you can’t make your board communicate with the computer.
To have a more information about the Arduino board, you can read our course dedicated to it.
The Software
To be able to control our Arduino board, we will have to program it. For this Arduino has developed a language derived from the C++ language. It is a kind of simplified C++ language for the Arduino.
A) The Arduino Language
In this course we will not teach you the Arduino language. We have made a whole series of courses for that. Each course in our category contains an important concept such as variables, list or loops.
Nevertheless we can give you some rules for the Arduino language that can help you to start:
- Unlike the C language, the Arduino contains two mandatory functions: Void Setup and Void loop.
Void setup: Contains the initialization of the components as input or output of the Arduino board, the initialization of the serial monitor that you can use to display value or text. The void setup function will be executed only once at the beginning of the program.
Void loop: This will run a loop with your instructions inside. It is allowing you to control your components without having to restart the program.
2. All written actions must be terminated with a semicolon so that the Arduino board understands that the action is finished.
3. All functions start and end with braces so that the Arduino board understands when the function starts and ends.
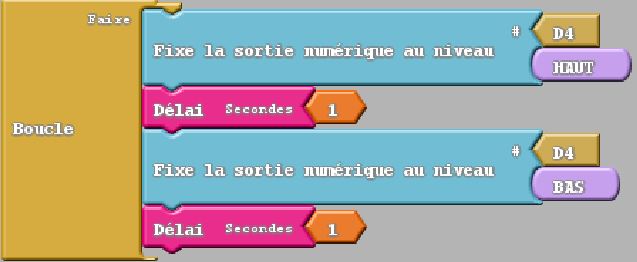
Here is an example of a program that allows you to make a LED blink:
int led_pin = 11;  // We assign the pin to the 11 pin
void setup() {
    pinMode(led_pin, OUTPUT); // We assign the led as an output
}
void loop() {
digitalWrite(led_pin,HIGH); // turn on the led
delay(1000); // delay to see the led turned on
digitalWrite(led_pin,LOW); // turn off the led
delay(1000);
}
In order to write your program, we will use an interpreter that will allow you to write, check and send your program to the Arduino board. This interpreter is called Arduino Ide.
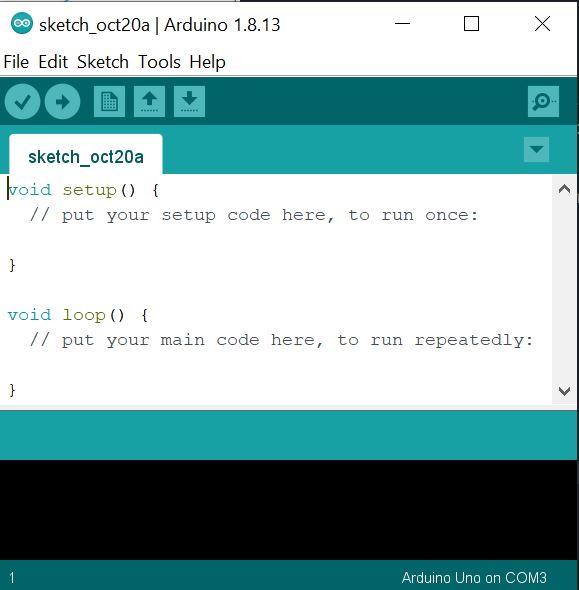
B) Arduino Ide
The Arduino Integrated Development Environment is a programming software that will be your interface between your Arduino board and the program. The Arduino IDE software has a compiler that will transform your program into a machine language understandable by the Arduino board.
You have two ways to create your program for your Arduino board:
Block programming, which means that you place elements on a diagram that correspond to elements in your program, such as a for loop block or variable block.
This works with a module on Arduino IDE called Ardublock.
Programming by line of code, which is what we will do here.
It means that you will directly write yourself the lines in Arduino language to make your program without graphical help.
On Arduino Ide, you have several functions that will be useful during the realization of your program:
Check button: Allows the software to compile your program, that is to say to transform it into machine language.

It will check if all the syntax is correct, i.e. that you have not forgotten a semicolon or a parenthesis for example. If you have a compilation problem, you can read our course about it.
Upload button: Allows you to send your program to your Arduino Board.

The software will first check your program if it’s has been written correctly and then transfer it to your Arduino board. If you have a problem uploading, you can read our course about it.
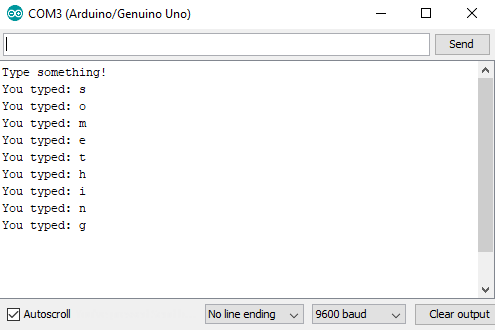
c) The serial monitor
The serial monitor is an interface between the user and the Arduino board that will receive information from the Arduino board and display it on Arduino IDE.
This information can be the temperature in degrees given by a sensor or the angle of a servomotor.
The serial monitor can only be opened when the Arduino board is connected and the program is uploaded to it.
d) The libraries
To make a certain component work, a library will sometimes be necessary. Libraries are a set of functions allowing to simplify the use of a sensor or a functionality. When an Arduino program contains a line starting with #include, it calls a library.
Arduino IDE allows to install and manage libraries in .zip or from the library manager. For this we recommend our course on libraries to learn more about it!