Introduction
To control your arduino card with python, there a library called Pyfirmata. This library make the link between the python Ide and your arduino card and permits you to control every pins of your arduino card.
There are others libraries to control your Arduino card from python but Pyfirmata is the easiest to use.

How to install Pyfirmata library?
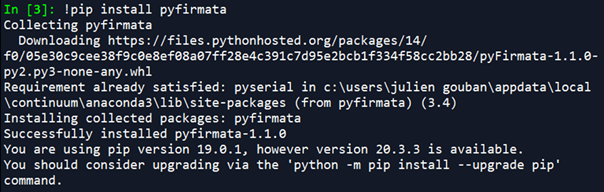
To install the Pyfirmata library, you have to write !pip install pyfirmata in the python consol.
You have on the right picture an example of a succeed installation of the Pyfirmata library:
For this tutorial, we will use Anaconda as a python interpreter.
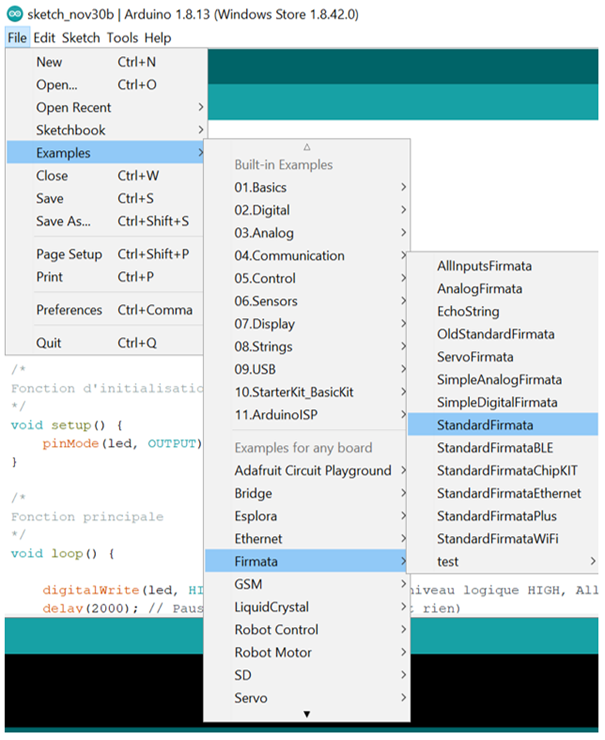
The next step to use Pyfirmata library is to go to Arduino ide and upload on your Arduino card the firmata program. You can find this program in the example bar. It’s allow to create a connection between your card and python.
We have installed StandardFirmata as you can see on the picture:
Blink the micro-led
This little program is useful to verify that everything is working. Furthermore you only need an Arduino card to make it works.
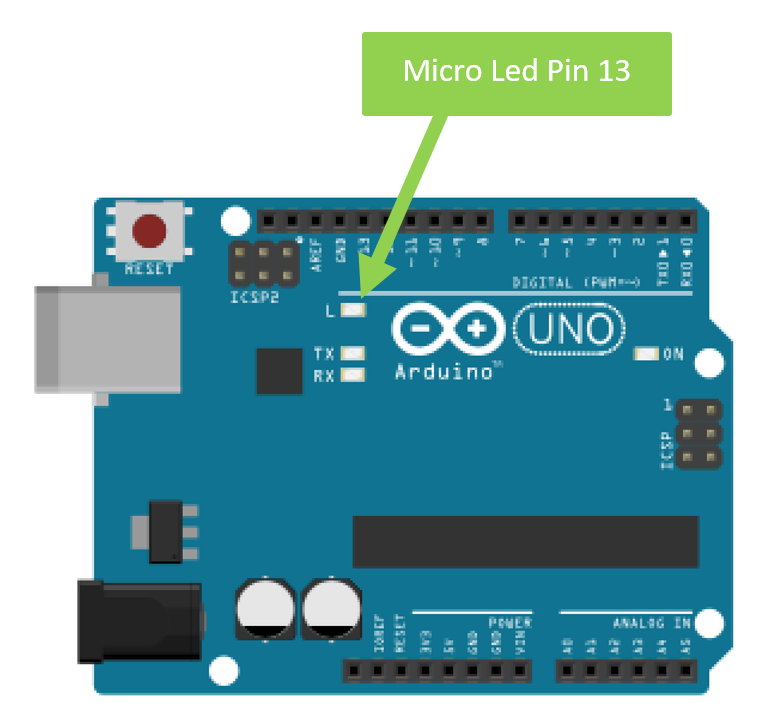
It consist to blink 10 times the micro-led linked to the pin 13 of your arduino card.
Remark: when you will do the test, you will see that the Rx blink also because it’s shows an interaction between the Python ide and the arduino card.
import pyfirmata # Import pyFirmata
import time # Import the time
port = 'COM3'# Windows
#port = '/dev/ttyACM3' # Linux
#port = '/dev/tty.usbmodem11401'# Mac
HIGH = True# Create a high state for turn on led
LOW = False # Create a low state for turn off led
board = pyfirmata.Arduino(port) # Initialize the communication with the Arduino card
LED_pin = board.get_pin('d:13:o') # Initialize the pin (d => digital, 13 => Number of the pin, o => output)
for i in range(10): # Loop to blink the micro-led dix times
LED_pin.write(HIGH) # Turn on the led
time.sleep(0.5) # Delay of 0.5 seconds
LED_pin.write(LOW) # Turn off the led
time.sleep(0.5) # Delay of 0.5 seconds
board.exit() # Closing the communication with the Arduino card
Remark: the program can run at the infinite by replacing the loop for by “While True”.
How to know which port COM your arduino card is linked to?
In order to see your program working, you have to specify which port COM your arduino card is linked to.
We will see how to find it.
Method 1: You can find the number of the port COM in the manager of device in the settings of your computer.
Method 2: You can also find it from Arduino Ide by clicking on tools and port

- On Linux, you can find the port COM thanks to the command line: ls-l /dev/ttyACM* in the command prompt.
- On mac, you can find the port COM thanks to the command line: ls -l/dev/tty.usb* in the command prompt.
Blink the led
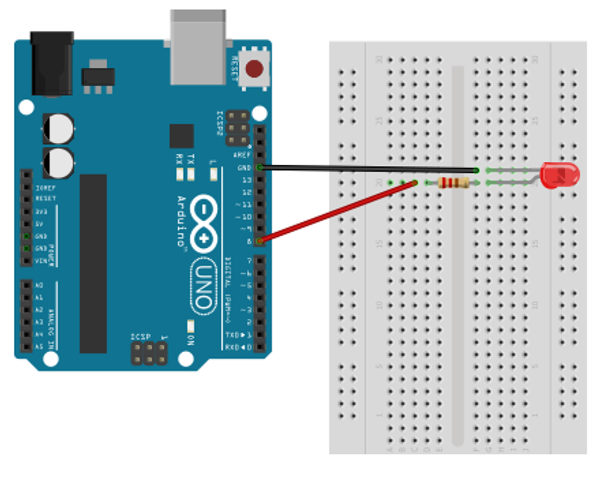
To blink the led you have to take the first program we have done and change the pin with the one where you have plug your led. In our example we have plug the led on the pin 8 of the Arduino card:
import pyfirmata # Import pyFirmata
import time # Import the time
port = 'COM3'# Windows
#port = '/dev/ttyACM3' # Linux
#port = '/dev/tty.usbmodem11401'# Mac
HIGH = True# Create a high state for turn on led
LOW = False # Create a low state for turn off led
board = pyfirmata.Arduino(port) # Initialize the communication with the Arduino card
LED_pin = board.get_pin('d:8:o') # Initialize the pin (d => digital, 8 => Number of the pin, o => output)
for i in range(10): # Loop to blink the micro-led dix times
LED_pin.write(HIGH) # Turn on the led
time.sleep(0.5) # Delay of 0.5 seconds
LED_pin.write(LOW) # Turn off the led
time.sleep(0.5) # Delay of 0.5 seconds
board.exit() # Closing the communication with the Arduino card
Here is the sketch of the circuit.
We use a resistor of 220 ohms in it.
Temperature sensor

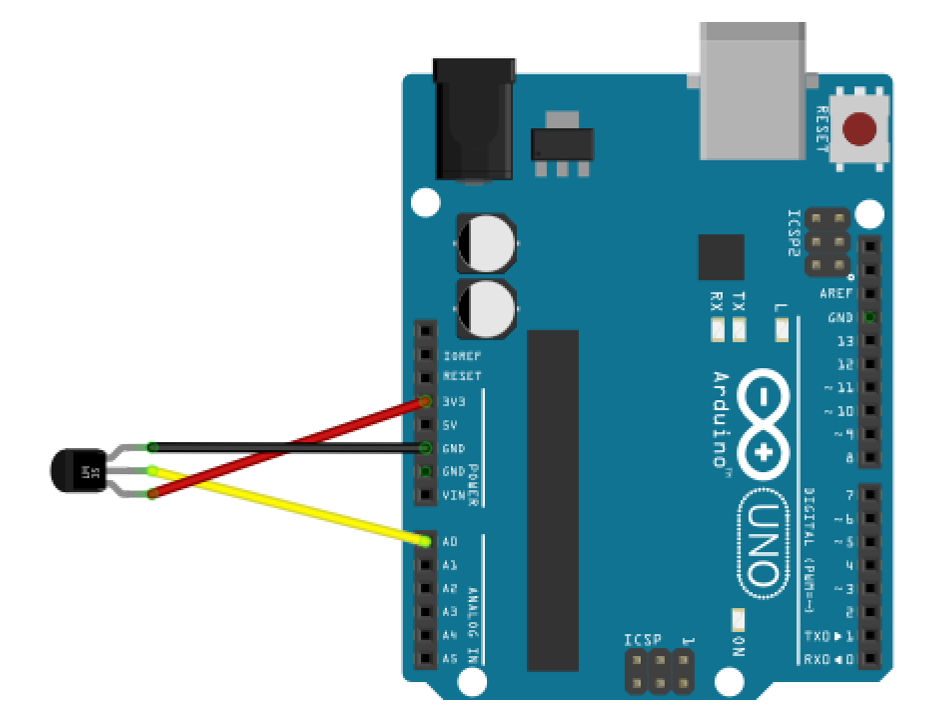
The temperature sensor detect a temperature and transmitted it in a voltage tension. This sensor is composed of 3 pins: Vcc, GND and signal one.
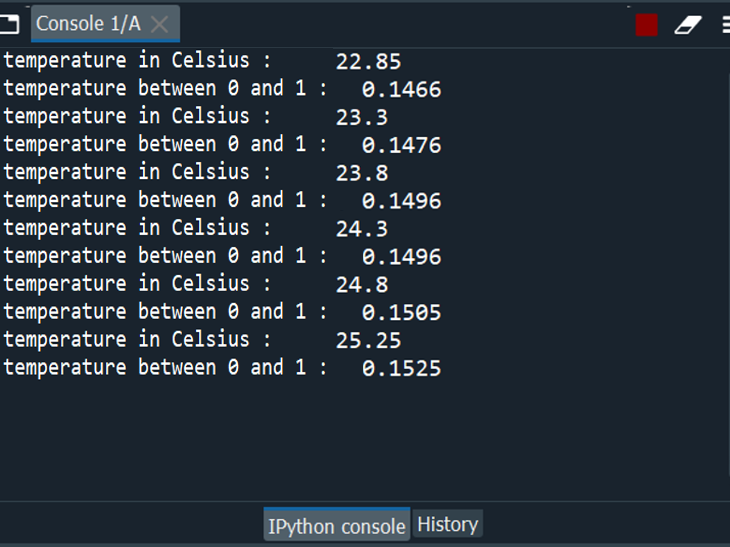
In this program we will display the temperature on the python console:
import pyfirmata
import time
port = 'COM3'# Windows
#port = '/dev/ttyACM3' # Linux
#port = '/dev/tty.usbmodem11401'# Mac
board = pyfirmata.Arduino(port) # To open the port COM linked to the Arduino card
temperature_pin = board.get_pin('a:0:i') # To initialize the pin used
iterator = pyfirmata.util.Iterator(board) # To initialized the link between Python and Arduino
iterator.start() # To start the connection
temperature_pin.enable_reporting() # Read the values from the pin
while temperature_pin.read() == None: None # As long as there are no values
try:
    while True: # Infinite loop
        print ("temperature between 0 and 1 :",temperature_pin.read()) # We display the values read by the pin
        Celsius = ((temperature_pin.read()*5 - 0.5) *100)  # We transform the values in Celsius
        print ("temperature in Celsius :" ,(round(Celsius,4))) # We round and display the temperature
        time.sleep(1)# Delay of 1 second between two measures Fait une pause de 1 seconde entre deux mesures
except:
    temperature_pin.disable_reporting() #Stop reading value
    board.exit( )
This is the sketch of the circuit:
This is what we can see while running the program:
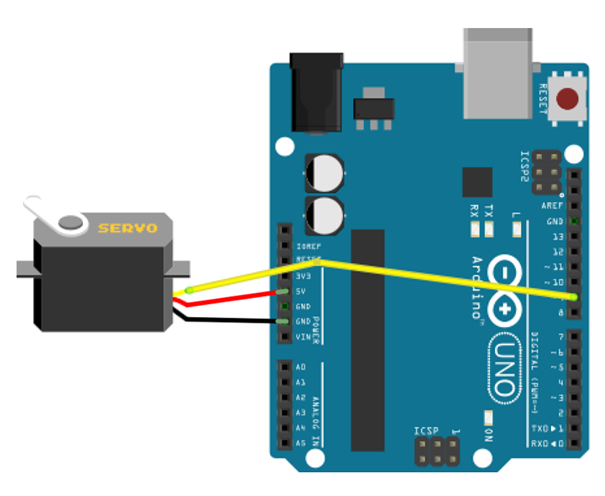
The servomotor

The servo-motor is a motor able to maintain a position to an effort and it’s position is known and corrected if needed.
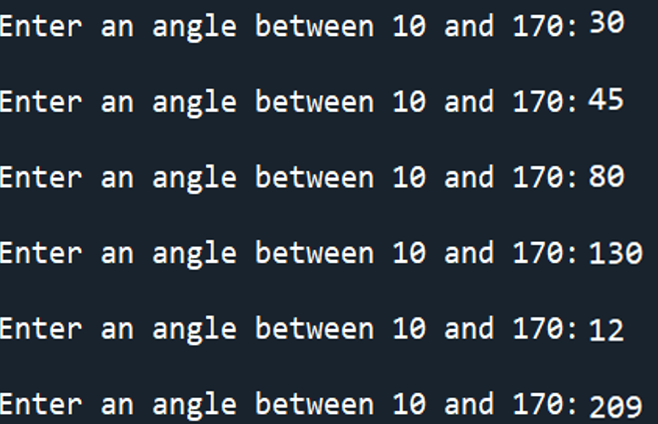
In the program below, you can enter an angle and the servo-motor will change the position according to the angle you have entered.
import pyfirmata
port = 'COM3'# Windows
#port = '/dev/ttyACM3' # Linux
#port = '/dev/tty.usbmodem11401'# Mac
board = pyfirmata.Arduino(port)
servo_pin = board.get_pin('d:9:s') # To initialize the pin used
try :
    while True: # Infinite loop
        angle = int(input("Enter an angle between 10 and 170:)"))
        if angle < 10 : # If the value is lower than 10 degrees then we block the position  at 10 degrees of the servomotor
            angle = 10
        elif angle > 170 : # If the value is higher thant 170 degrees than we block the position at 170 degrees of the servomotor
            angle = 170
            servo_pin.write(angle) # We assign this value into the servomotor
except :
    board.exit()
This is the sketch of the circuit:
This is what we can see by running the program:
Program to display the value of any component
In this parts, we will show how to display the value of any components. To do that you have to change some lines to specify if it’s an input or an output.
import pyfirmata
import time
port = ‘COM3’
board = pyfirmata.Arduino(port) # To open the port COM linked to the Arduino card
your_component_pin = board.get_pin(‘a:0:i’) # To initialize the pin used
iterator = pyfirmata.util.Iterator(board) # to initialize the link between the card and python
iterator.start() # To start the connection
your_component_pin.enable_reporting() # to read the values
while your_component_pin.read() == None: None # As long as there is no value
try:
while True:
print (« The value is : « ,your_component_pin.read()) # Read and display the values
time.sleep(1) # Delay between two measures
except:
your_component_pin.disable_reporting()
board.exit()
Here is the modification you have to do make a program for your component:
- Which is highlight in turquoise can be replaced by the name of your component such as push button or motor. Don’t forget to write what is after the dot. For example push_button.read() instead of your_component_pin.read().
- Which is highlight in Green can be replaced by a value from the table:
|
|
Input (sensor, button …)
|
Output (motor, led …)
|
|
d => digital
|
(d : N° pin : i)
|
(d : N° pin : o)
|
|
a => analog
|
(a : N° pin : i)
|
(a : N° pin : o)
|
 Be careful, There are 2 exceptions for digital:
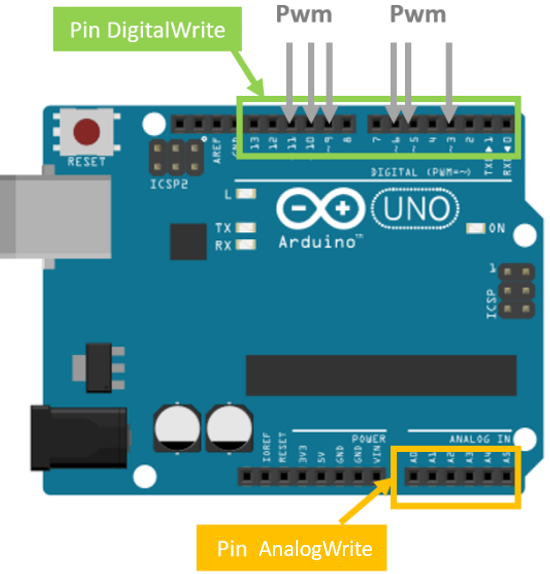
1) (d : N° pin: p) -> p means pulse width modulation (pwm), which permits you to vary the brightness of a led for example.
2) ( d : N° pin: s) -> s means servomotor.You have to use it only if your component is a servomotor.
d = digital, we use it if we want to control a component (a motor for example)
a = analog, we use it for all sensors which return a tension
i = input
o = output